| Version 4 (modified by , 8 years ago) ( diff ) |
|---|
Apriltags Follower demonstration
This page describes all you have to know to use the ApriltagFollower demonstration, in simulation and in real conditions.
The ApriltagFollower demonstration's goal is to make an uav follow an Apriltag autonomously and without using motion capture system.
The ultimate goal of the demonstration is to have two different uavs flying together : one following a line and holding an Apriltag and another following the first uav thanks to the Apriltag. But this goal has not been reached for now, the control law used to follow the Apriltag is not robust enough to compensate the wind from the second uav.
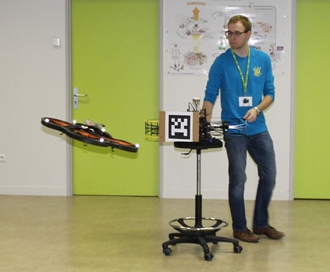
This demonstration looks like that :

How does the demonstration work ?
TODO
Folder organization
The ApriltagFollower main folder is composed of three sub-folders :
- apriltags : this folder contains the sources of a program mandatory to make this demonstration work. Please see the apriltags/README.md file for more informations
- simulator : this folder contains the sources for the simulator
- uav : this folder contains the sources for the uav program (simulation and real)
Compilation
apriltags program
Before going further, you have to compile the apriltags program. To do it, go in the apriltags folder and launch the make.sh file :
cd apriltags
./make.sh
If it fails, you have to read the specific compilation instructions of the apriltags component. You can find those instructions in the apriltags/README.md file.
Simulator and uav programs
Normally the components for this demonstration are automatically compiled when Flair framework is compiled.
If not or if you want to compile the components yourself, here are the instructions.
For the simulator :
cd $FLAIR_ROOT/flair-hds/src/demos/ApriltagFollower/simulator
$FLAIR_ROOT/flair-dev/scripts/cmake_codelite.sh
cd build
make -j4
For the uav :
cd $FLAIR_ROOT/flair-hds/src/demos/ApriltagFollower/uav
$FLAIR_ROOT/flair-dev/scripts/cmake_codelite.sh
cd build
make -j4
cd ../build_arm
make -j4
Launching simulation
In order to launch the simulation you have to launch several components :
- Flair Ground Station
- Dualshock3, to be able to control an uav using Dualshock3 controller
- The apriltags_detector program
- The simulator
- An uav for the uav holding the Apriltag
- An uav for the uav following the Apriltag
Each program has to be launched in a separate terminal.
Flair Ground Station
$FLAIR_ROOT/flair-bin/tools/scripts/launch_flairgcs.sh
Dualshock3 controller
If the Bluetooth is configured on your computer (see this page) you can launch the Bluetooth version :
$FLAIR_ROOT/flair-bin/tools/scripts/dualshock3_local_bt.sh
If not, use the USB wire instead :
$FLAIR_ROOT/flair-bin/tools/scripts/dualshock3_local_usb.sh
Important note : by default, the Dualshock3 is connected to the port 20000. It suits with the uav holding the Apriltag, not the one following it.
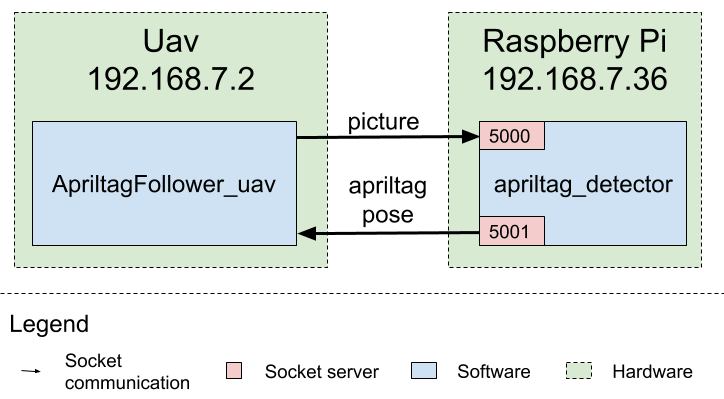
apriltags_detector program
Go in the apritags folder and simply launch the apriltags_detector program :
cd $FLAIR_ROOT/flair-hds/src/demos/ApriltagFollower/apriltags
./apriltags_detector
Important note : this program has to be launched BEFORE the uav following the Apriltag ! Otherwise it will crash...
Simulator
The simulator script manages two uavs, you don't have to launch a simulator for each one.
cd $FLAIR_ROOT/flair-hds/src/demos/ApriltagFollower/simulator/build/bin
./simulator_x4.sh
Uav with the tag
The uav program for the uav holding the tag does not matter : you just have to be able to control it using the dualshock3 controller. So you can for instance use the uav from the CircleFollower demonstration :
cd $FLAIR_ROOT/flair-src/demos/CircleFollower/uav/build/bin
./x4.sh
This uav will be controlled using the controller. So wait to takeoff the follower uav before moving.
Uav following the tag
The uav program for the uav following the tag, you have to use the ApriltagFollower uav :
cd $FLAIR_ROOT/flair-hds/src/demos/ApriltagFollower/uav/build/bin
./ApriltagFollower.sh
You don't have a controller to control this uav. So you first have to take it off using the ground station and clicking on "takeoff" button. Once it's done, takeoff the other uav. After the two uavs have taken off, you can start to follow the Apriltag. Simply click on "start_following" on the ground station. If you move the other uav using the controller, the follower should move to follow it.
Launching real demonstration
The real demonstration is a little bit more complicated to launch has there are several more configuration steps and specific hardware...
Specific uav and raspberry pi
First thing different for the ApriltagFollower : you can't use the uav you want ! Indeed, because of the Raspberry Pi connexion you have to use specific uavs, which have a modified kernel to support Ethernet-over-USB feature. In the laboratory there are two uavs modified for this demonstration, stored in a special area. So if you want an uav, you have to ask Guillaume for one.
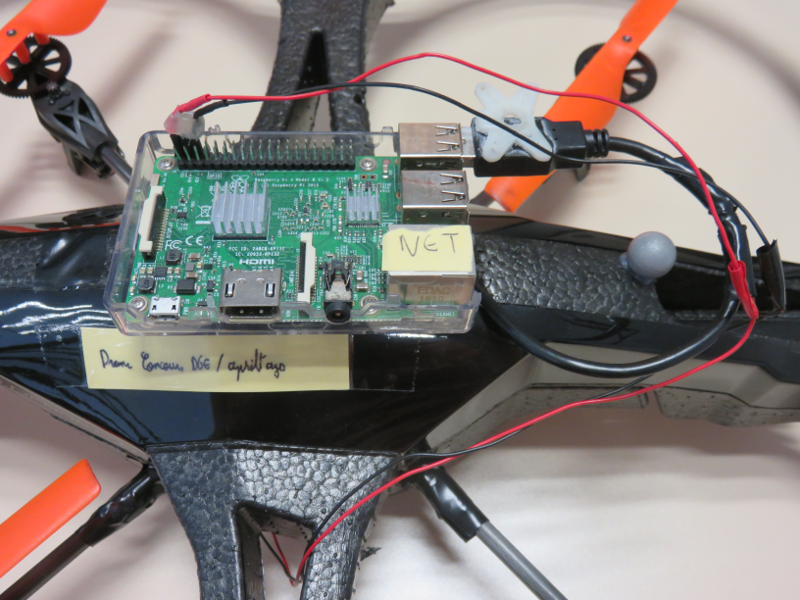
Once you have the uav, you will need to get a Raspberry Pi 3 board. In theory you have one board with the uav. If not, things will be a little bit more complicated as you will have to find a board and flash the correct distribution with the correct programs...
TODO : put a generic working rpi image on a server to be able to flash easily a raspi with the correct image
Okay, you have an uav and a raspberry pi, now you have to connect them together ! If you are lucky, it's already done, if not, take a look to the next section.
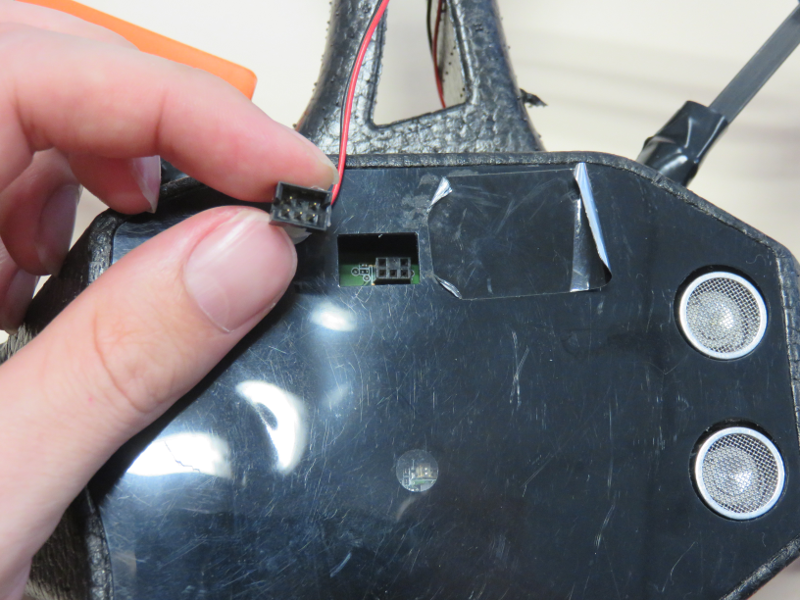
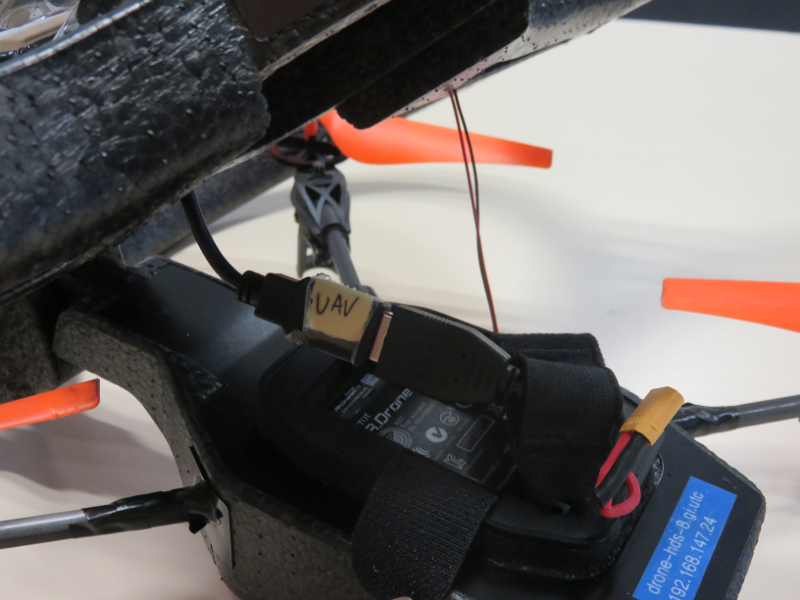
Connecting the Raspberry Pi to the uav
TODO + add pictures
cmdline.txt file : cfg80211.ieee80211_regdom=GB
Power on the uav
Nothing complicated, you just have to plug the battery and to verify that the Raspberry Pi is also powered on (a red and a green light must be on).
MANDATORY STEP : Wait 1 minute (a real minute, if not, it will fail !) to let the Raspberry Pi time to boot and then you have to unplug the USB on the Raspberry Pi and to replug it.
On the computer
You just have to launch the ground station and the dualshock3 controller :
Ground station :
$FLAIR_ROOT/flair-bin/tools/scripts/launch_flairgcs.sh
Dualshock3 controller, replacing the uav_ip by the real ip of the uav (192.168.147.xxx) :
$FLAIR_ROOT/flair-bin/tools/scripts/dualshock3_usb.sh uav_ip
On the Raspberry Pi
First of all, you have to connect to the Raspberry Pi (the IP address may differ) :
ssh pi@192.168.147.214
password : raspberry
Next you have to check that the USB connection with the uav is working :
ifconfig
If you can see a connexion named "usb0" it's okay, you can go further. If not, unplug and replug the USB connector from the Raspberry Pi. If you still can't see the "usb0" interface, then you have a big problem... Ask Guillaume, the demonstration will not work without this interface.
The only program you have to launch on the Raspberry Pi is the apriltags_detector program. Depending on where it is installed, just launch it :
cd somewhere/apriltags
./apriltags_detector
On the uav
On the uav you have to launch the uav program.
First, upload it if it's not done (replace the uav_ip_address and folder_location by your values) :
scp $FLAIR_ROOT/flair-hds/src/demos/ApriltagFollower/uav/build_arm/bin/* root@uav_ip_address:folder_location
Connect to the uav :
ssh root@uav_ip_address
Go to the correct folder and launch the uav :
TODO
It may crash because the dsp program is not present. You can get it from ???
TODO
Launch the demonstration !
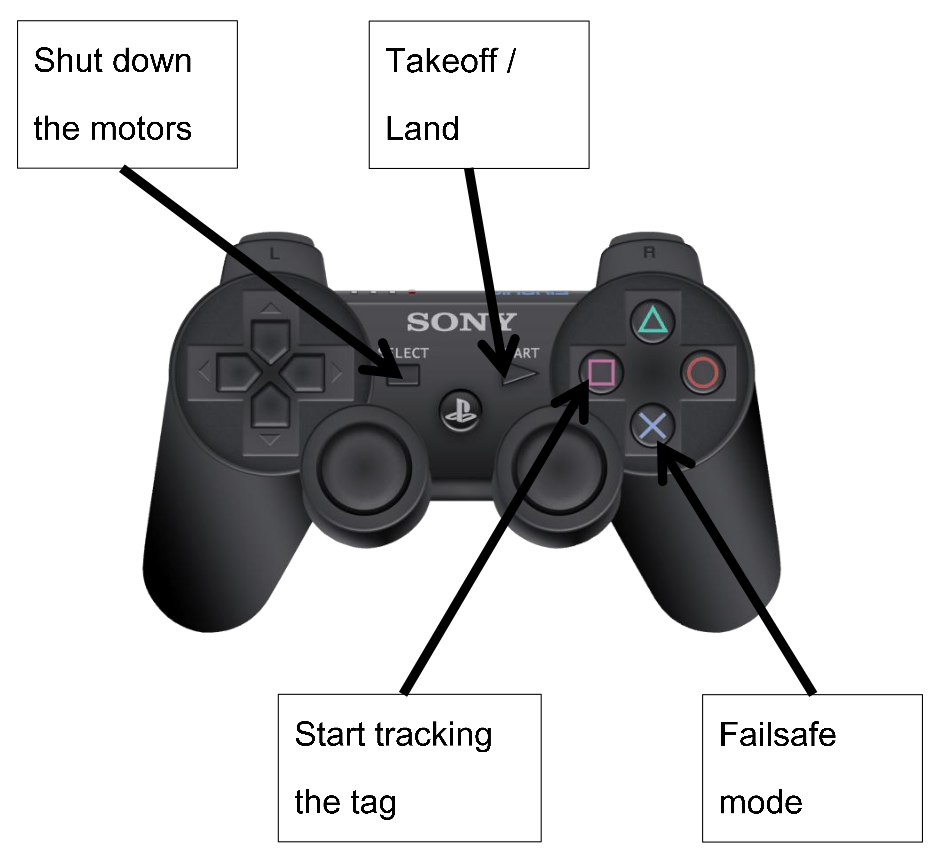
Okay, everything is setup correctly. Before taking off the uav, make sure you have an Apriltag to follow in the area (hold by a static uav, a person, no matter).
It's time to takeoff, press the START button of your controller.
Go manually in about 1 meter from the Apriltag and launch the following process, using the SQUARE button.
Now you can smoothly move the tag for a beautiful demonstration ;) Do not move the tag too fast as the follower will not see it anymore.
Attachments (9)
- demo_tag.png (115.7 KB ) - added by 8 years ago.
- cable_doc.png (7.5 MB ) - added by 8 years ago.
- cable_doc_small.png (651.3 KB ) - added by 8 years ago.
- raspberry-pi_wiring.png (688.2 KB ) - added by 8 years ago.
- uav-power_wiring.png (661.6 KB ) - added by 8 years ago.
- uav-usb_wiring.png (551.9 KB ) - added by 8 years ago.
- 2018-08-17_dge-schema-communication-real.png (25.2 KB ) - added by 8 years ago.
- 2018-08-17_dge-schema-communication-simu.png (20.1 KB ) - added by 8 years ago.
- apriltag_demo_controller.png (157.8 KB ) - added by 8 years ago.